
 Truth is, I am a Beatles fan. Have been for a while. And sneaking their song lyrics into my home is a hobby of mine. Also, my sofa needs pillows. I have been making them at the speedy rate of one a year the last two years. So yeah, my sofas still need pillows.
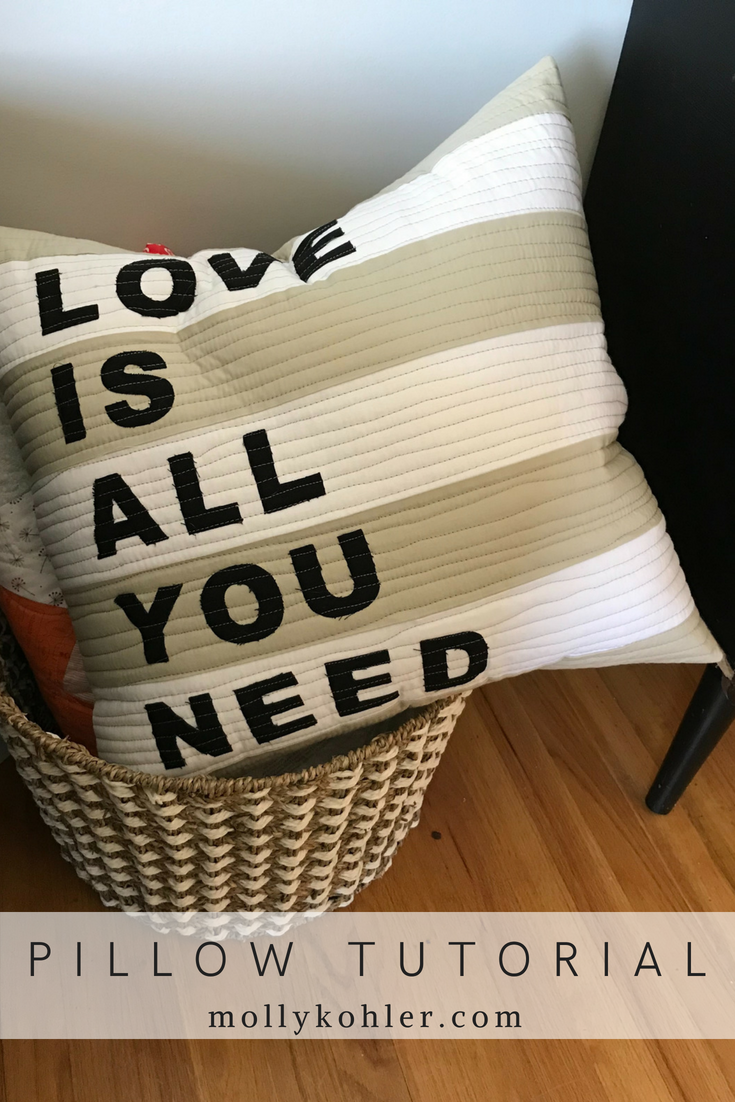
This pillow is easy and fast. Who doesn’t love that? Originally I thought this would be a valentine decoration, but I ended up with something that worked all year!
Lets get started! Here’s what you need.
Supplies and Tools
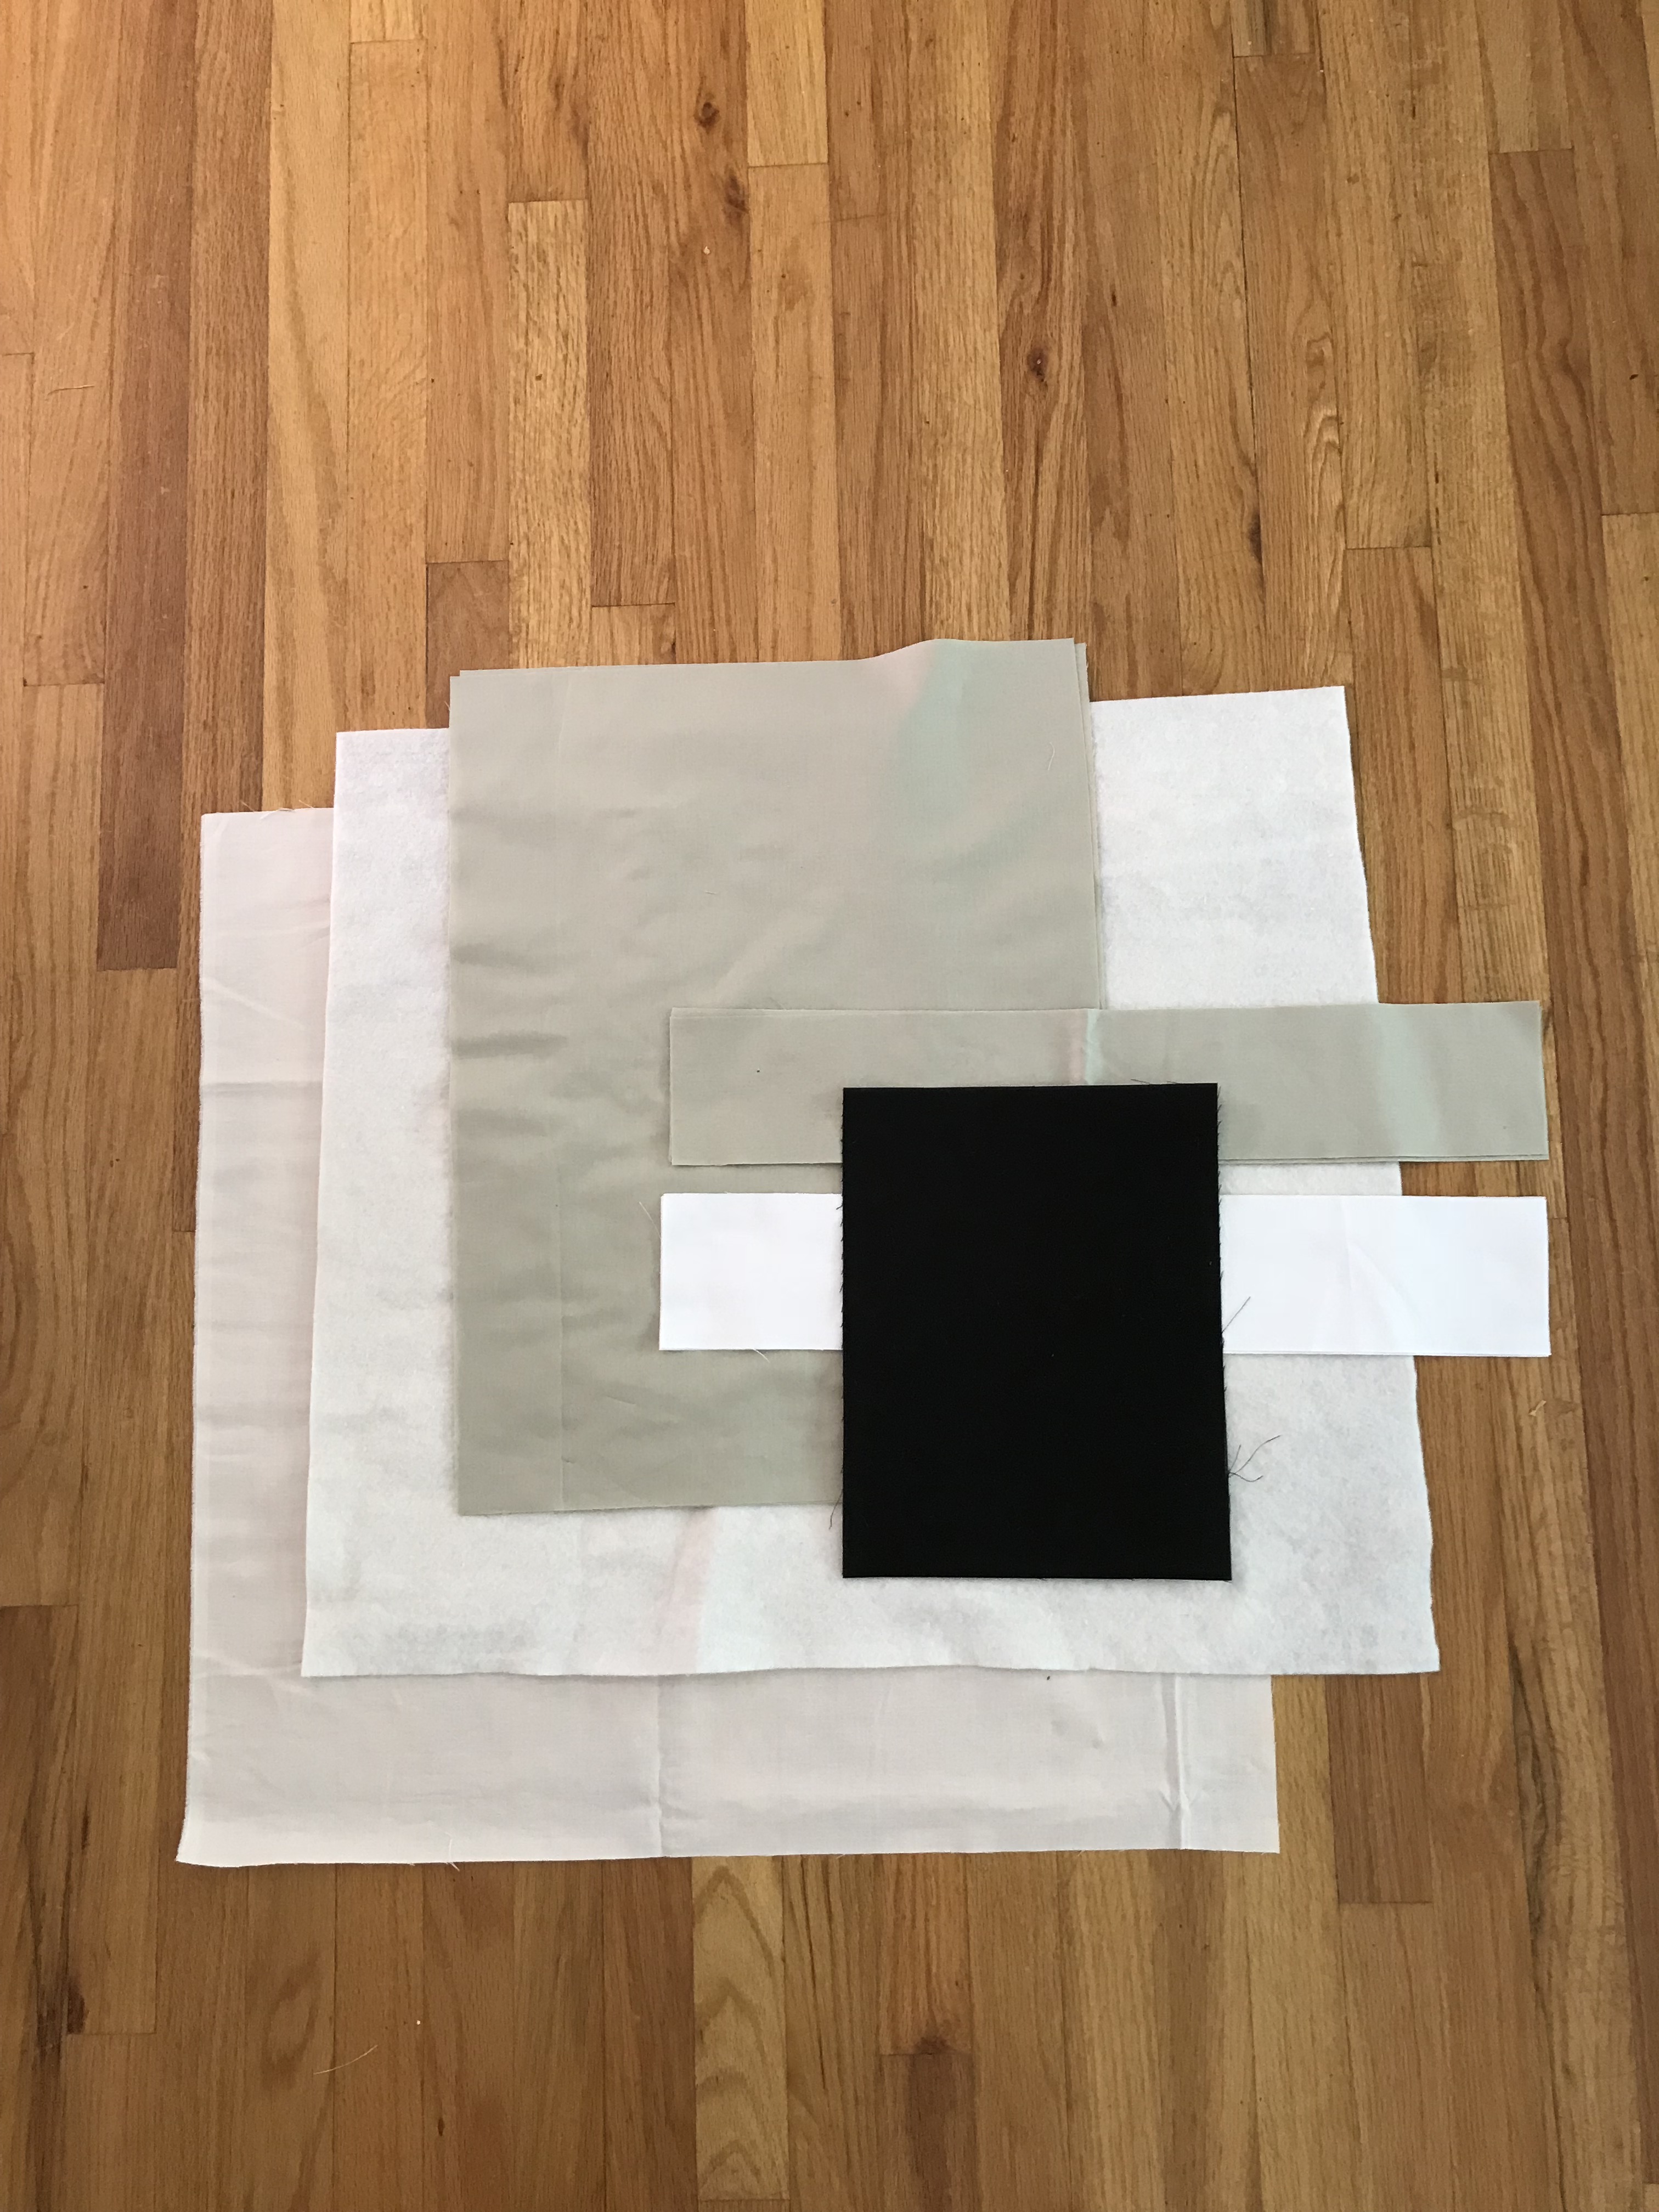
- 20″ pillow form
- Light Fabric: 1 fat quarter or 1/4 yard of fabric
- Accent Fabric: 2/3 yard
- Fabric for Letters: 8 1/2″x11″ rectangle
- Scrap of batting about 24″ square
- Fusible Web
- Rotary cutter, ruler, and mat
- Sharp fabric scissors
- Thread for sewing and quilting
- Iron

Cut The Letters
I used my Silhouette Portrait to Cut my letters, but you can do it easily by hand.
For the words, I used the font Ariel Black, and the size 175 pt.
If you are using a Silhouette:
- Cut a piece of fusible web slightly smaller than your 8 1/2″ x 11″ piece of fabric
- Iron it to the back of your fabric following the manufacturers directions.
- Create a document in Silhouette Studio with the letters you need to spell, “ALL YOU NEED IS LOVE.” I had to be a little creative with the layout to squish them all in there.
- Feed your web backed fabric into your cutting machine, right side up, make sure your machine’s settings are correct for cutting fabric, and send the cut job to the Silhouette.
- Peel out your letters, and set them aside.
If you are using scissors:
- Print your letters using a word processor. I like to print mine using the mirror image option.
- Trace the letters onto your fusible web. You want your letters to be traced backwards. This is why I use the mirror image setting. You can also just flip your printed paper over backwards and trace through the backside.
- Iron your fusible web to the BACK SIDE of your letter fabric.
- Cut out your letters and set them aside.
Cut Pillow Fabrics
From light fabric cut 3 strips 3 1/2″ x 20″ and 2 rectangles 15 1/2″ x 20″
From accent fabric cut 4 strips 3 1/2″ x 20″
Cut a piece of batting about 24″ square
If desired cut piece of muslin to back your pillow front with when quilting. This will need to be about 24″ square as well.
Pillow Front
- Using 1/4″ seam sew 3 1/2″ x 20″ strips together, alternating accent and light fabrics.
- Press seams toward accent fabric.
- Trim your pillow front to 20″x20″ square. Find the center of your pillow, and trim off the excess on either side. You will be taking a little of both the top and bottom stripe.
- Peel the backing off of your letters and lay them out on your pillow front, starting 3″ from the left edge. Space the letters to your liking and iron into place. For best results follow the directions on the package of fusible web.
- Quilt your pillow front to the batting. You may use some muslin or scrap fabric for a backing here if you would like, but I have found that just using batting works great. I quilted mine on my longarm with straightish lines about 1/4″ apart. I made sure to catch the top and bottom of each letter close to the edge.
Pillow Assembly
- Iron a hem on each of your 15 1/2″x 20″ pillow back pieces. On the 20″ side of fold over 1″ and press, then repeat, so there are no raw edges showing. Pin in place. Do this on each back piece.
- Sew the hem. I like to sew about 1/8″ from the folded edge and the edge of the hem.
- Pin front and back. Lay pillow front right side up. Pin one side of the back to the pillow. The hemmed edge should be in the middle of the pillow running vertically. Now lay the other back piece on the opposite side, so it over laps the first in the middle of the pillow. Pin in place.
- Sew a 1/2″ seam all the way around the edge.
- Trim the corners just a little to reduce bulk.
- Turn right side out and press seams out. Fill with a pillow form!
Don’t hesitate to send me a message if you have any questions or comments about this tutorial! I would love to see your finished projects! Don’t forget to tag me on Instagram!

What a fun pillow. I can see many quotes or lyrics being substituted, although this one is clearly fantastic as is! Thank you for linking up with the Tips and Tutorials Festival.