


Every autumn I fall in love with pumpkins all over again. They have to be the cutest thing that grows on a vine. I love the round shape and the mostly smooth texture. I love all of the shades of orange, yellow, white and green. And even better, I like eating chocolate chip pumpkin cookies.

These fabric pumpkins have all the best qualities of real pumpkins as far as cuteness goes. And they take very little supplies and time to make. You could easily make these with your kids or even better have a neighborhood craft day with your favorite mama’s. Who is bringing the apple cider and pumpkin cookies?
Here is what you need to get started.
- Fabric: Choose solids or simple prints. Use Scraps from your stash, or fat quarters. If purchasing yardage you will need the following amounts for each size. This amount will make two of each size: Large 1/3 yard, Medium 1/4 yard, Small, 1/4 yard.
- Good quality thread and a needle.
- Embroidery floss or pearl cotton
- Doll Needle
- Fiber Fill
- Small stick
- Fabric Scrap

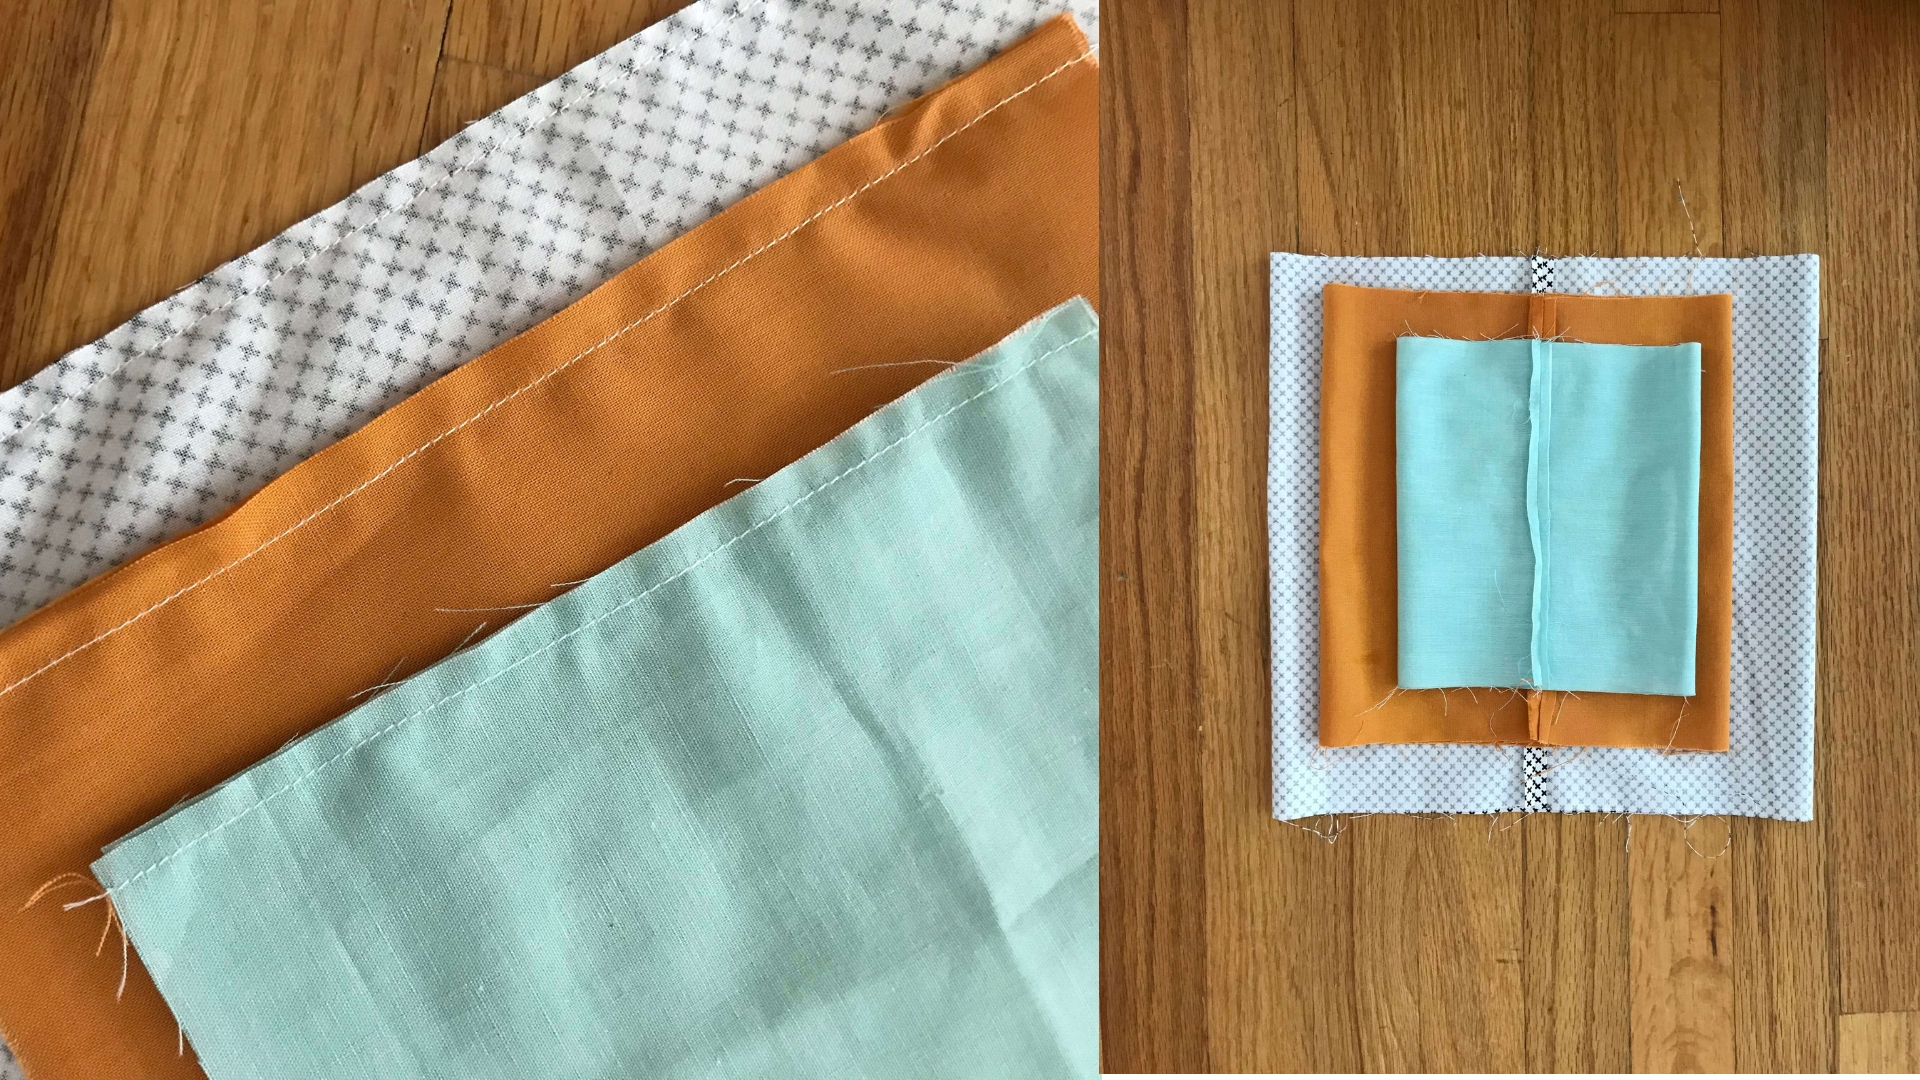
Cutting your fabric. You will need the following size pieces of fabric. I like to use my cutting mat and rotary cutter to easily cut these pieces.
Large: 10.5″ x 20.5′
Medium: 8.5″ x 16.5″
Small: 6.5″ x 12.5″
Did you notice that the fabric pieces you need are roughly twice as long as they are tall? Use this idea to make pumpkins any size you would like.
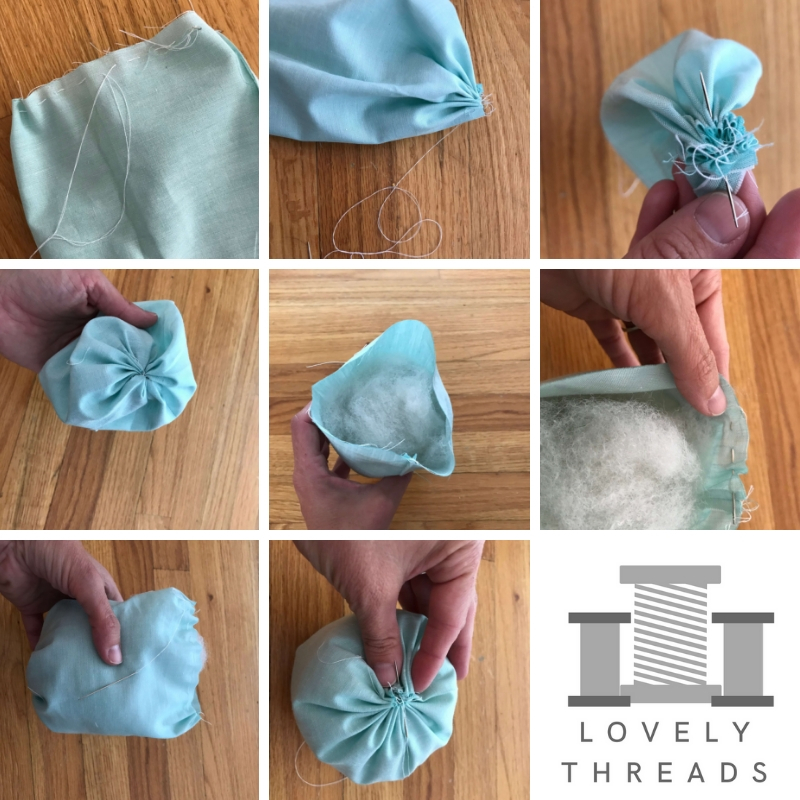
Sew fabric pieces into tubes. Fold each piece of fabric in half, with right sides together, matching the short edges. Sew a 1/4″ seam along the short edge. Be sure to press your seam for a nice finished look.
Gather and stuff the pumpkin. Start by double threading your needle with a length of thread about as long as your arm. Knot the end. Starting at the seam sew a running stitch 1/4″ from the raw edge on one side of your pumpkin. When you get back to the seam, gather your stitches tight and knot your thread a couple of times. For added security, I like to take a few stitches straight through the gathers, rotating a little bit each time. Finish by knotting and trimming your thread.
Turn your pumpkin right side out and fill with fiber fill. I like mine moderately full. About as full as a throw pillow. If they are too loosely filled, they will not puff out as nicely.
Repeat the gather stitch on the other raw edge of fabric. Gather the stitches and secure them the same as the first edge.
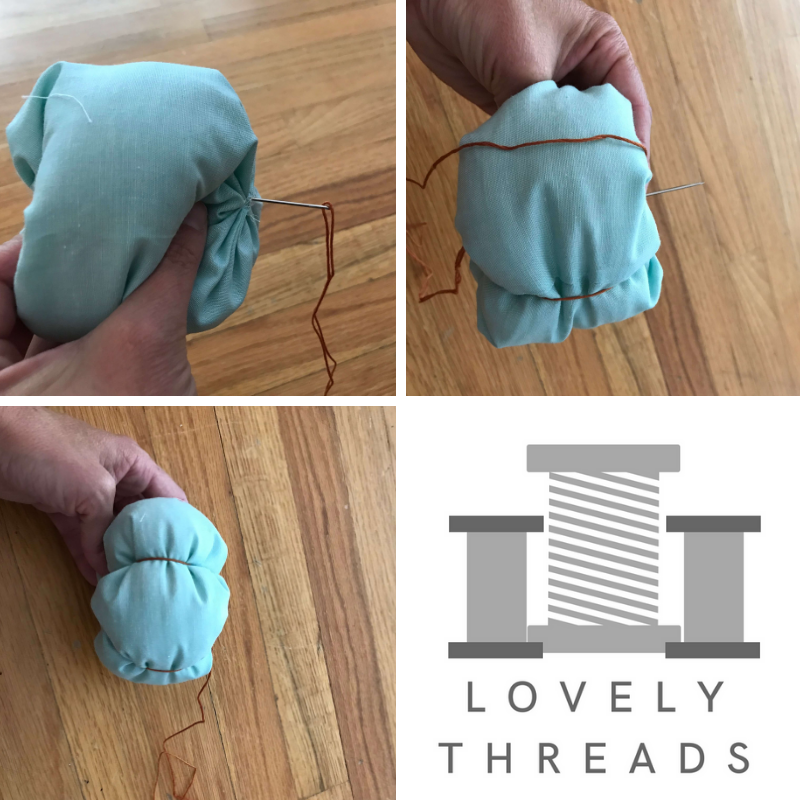
Making the Veins. I like to use all strands of embroidery floss to create my pumpkin veins. You will need a length about 6 times as long as the shorter length of your fabric. Thread your needle and tie a nice sized knot in the end. Starting at the top of the pumpkin, stitch near the center but not exactly through the center. Push your long doll needle all the way through the bottom of the pumpkin while squishing it down a bit. Wrap the floss back up around to the top of the pumpkin to create a vein. While squishing your pumpkin, take another stitch from top to bottom. Adjust the wrinkles in your pumpkin as you repeat this until you have made five veins. It is important as you sew each vein to make sure you have used the same tension. You can move the veins a little from side to side once you have stitched them all and secured your stitching with a knot.
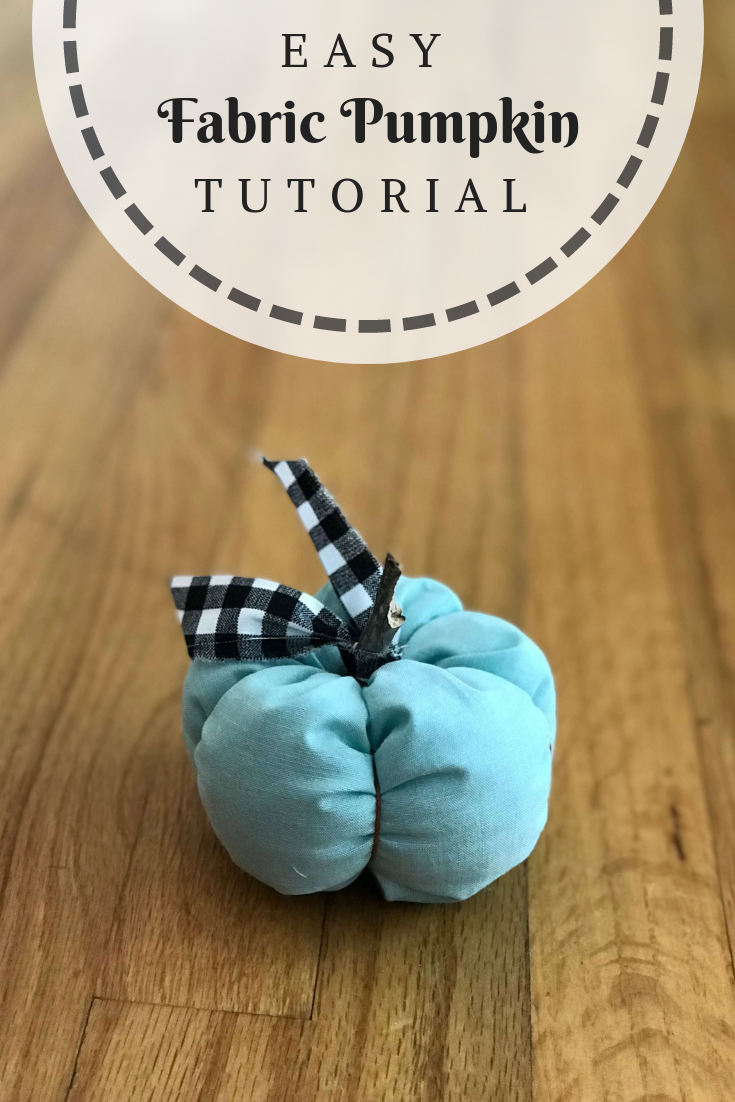
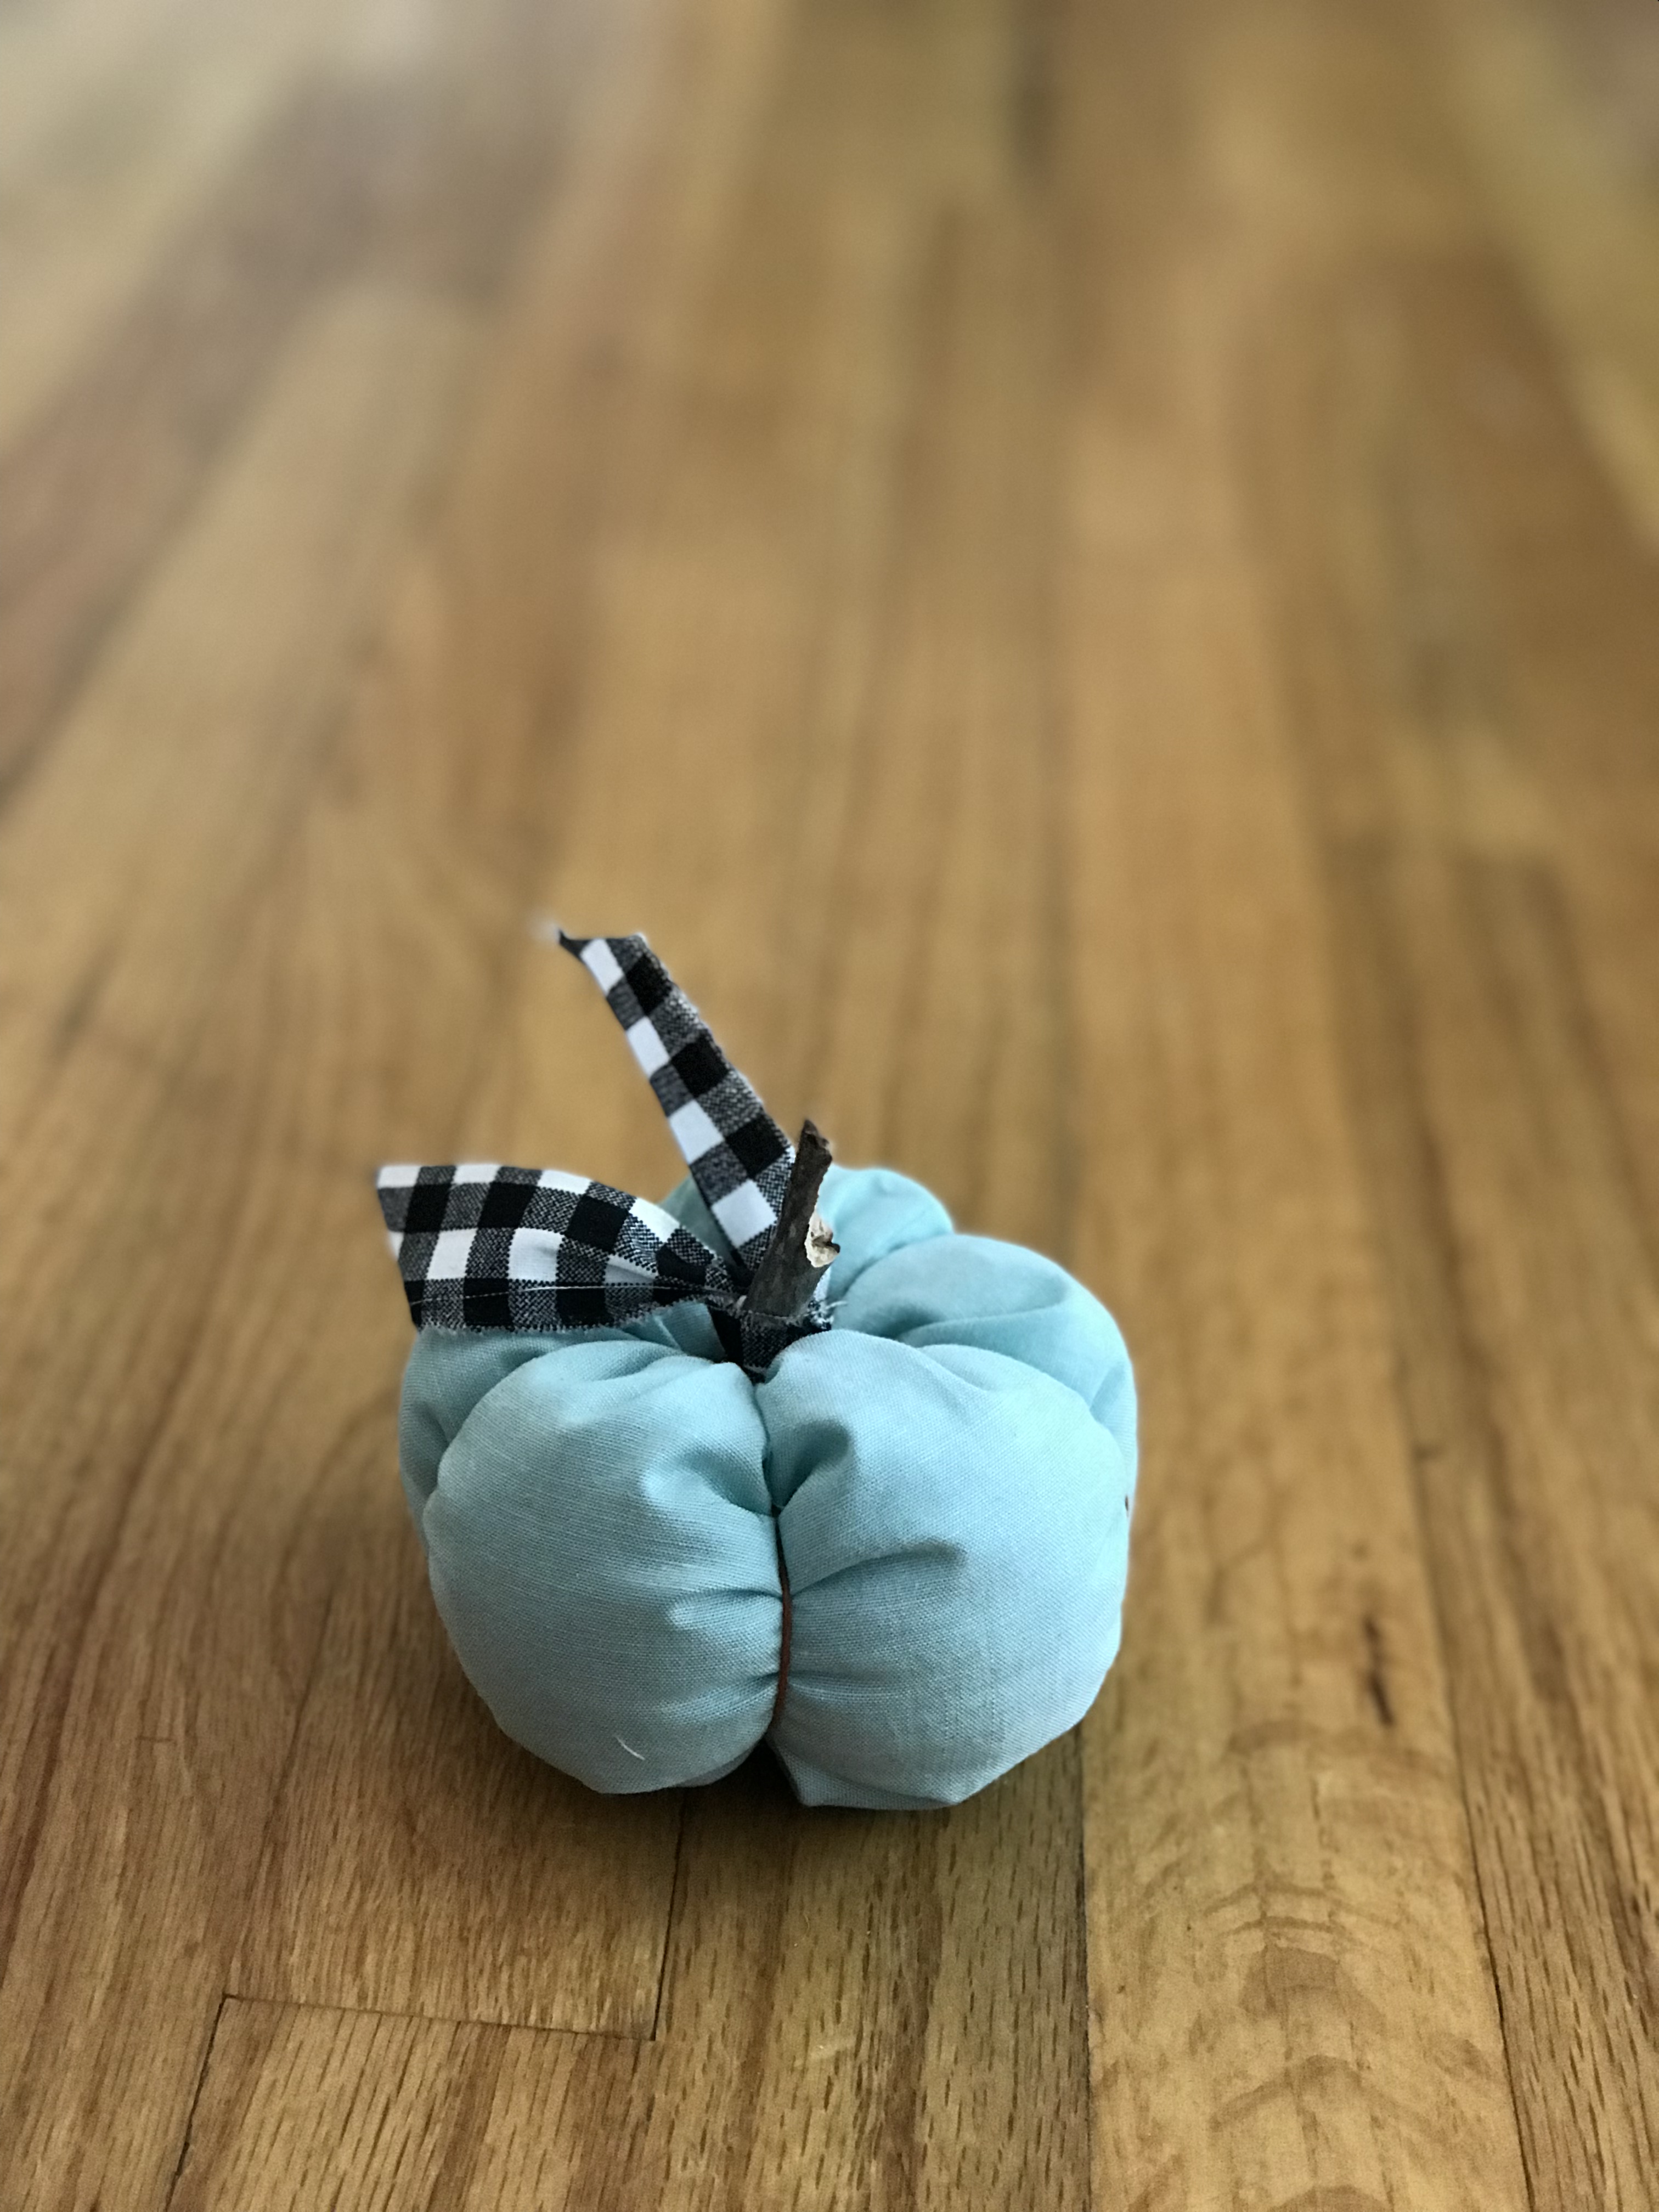
Finishing Details. For the stem use a small piece of a stick, about 1-2″ in length. Simply glue it to the center top of your pumpkin using a hot glue gun. Finish it off with a tie made from a 1″x6″ piece of fabric or a scrap of ribbon or lace.

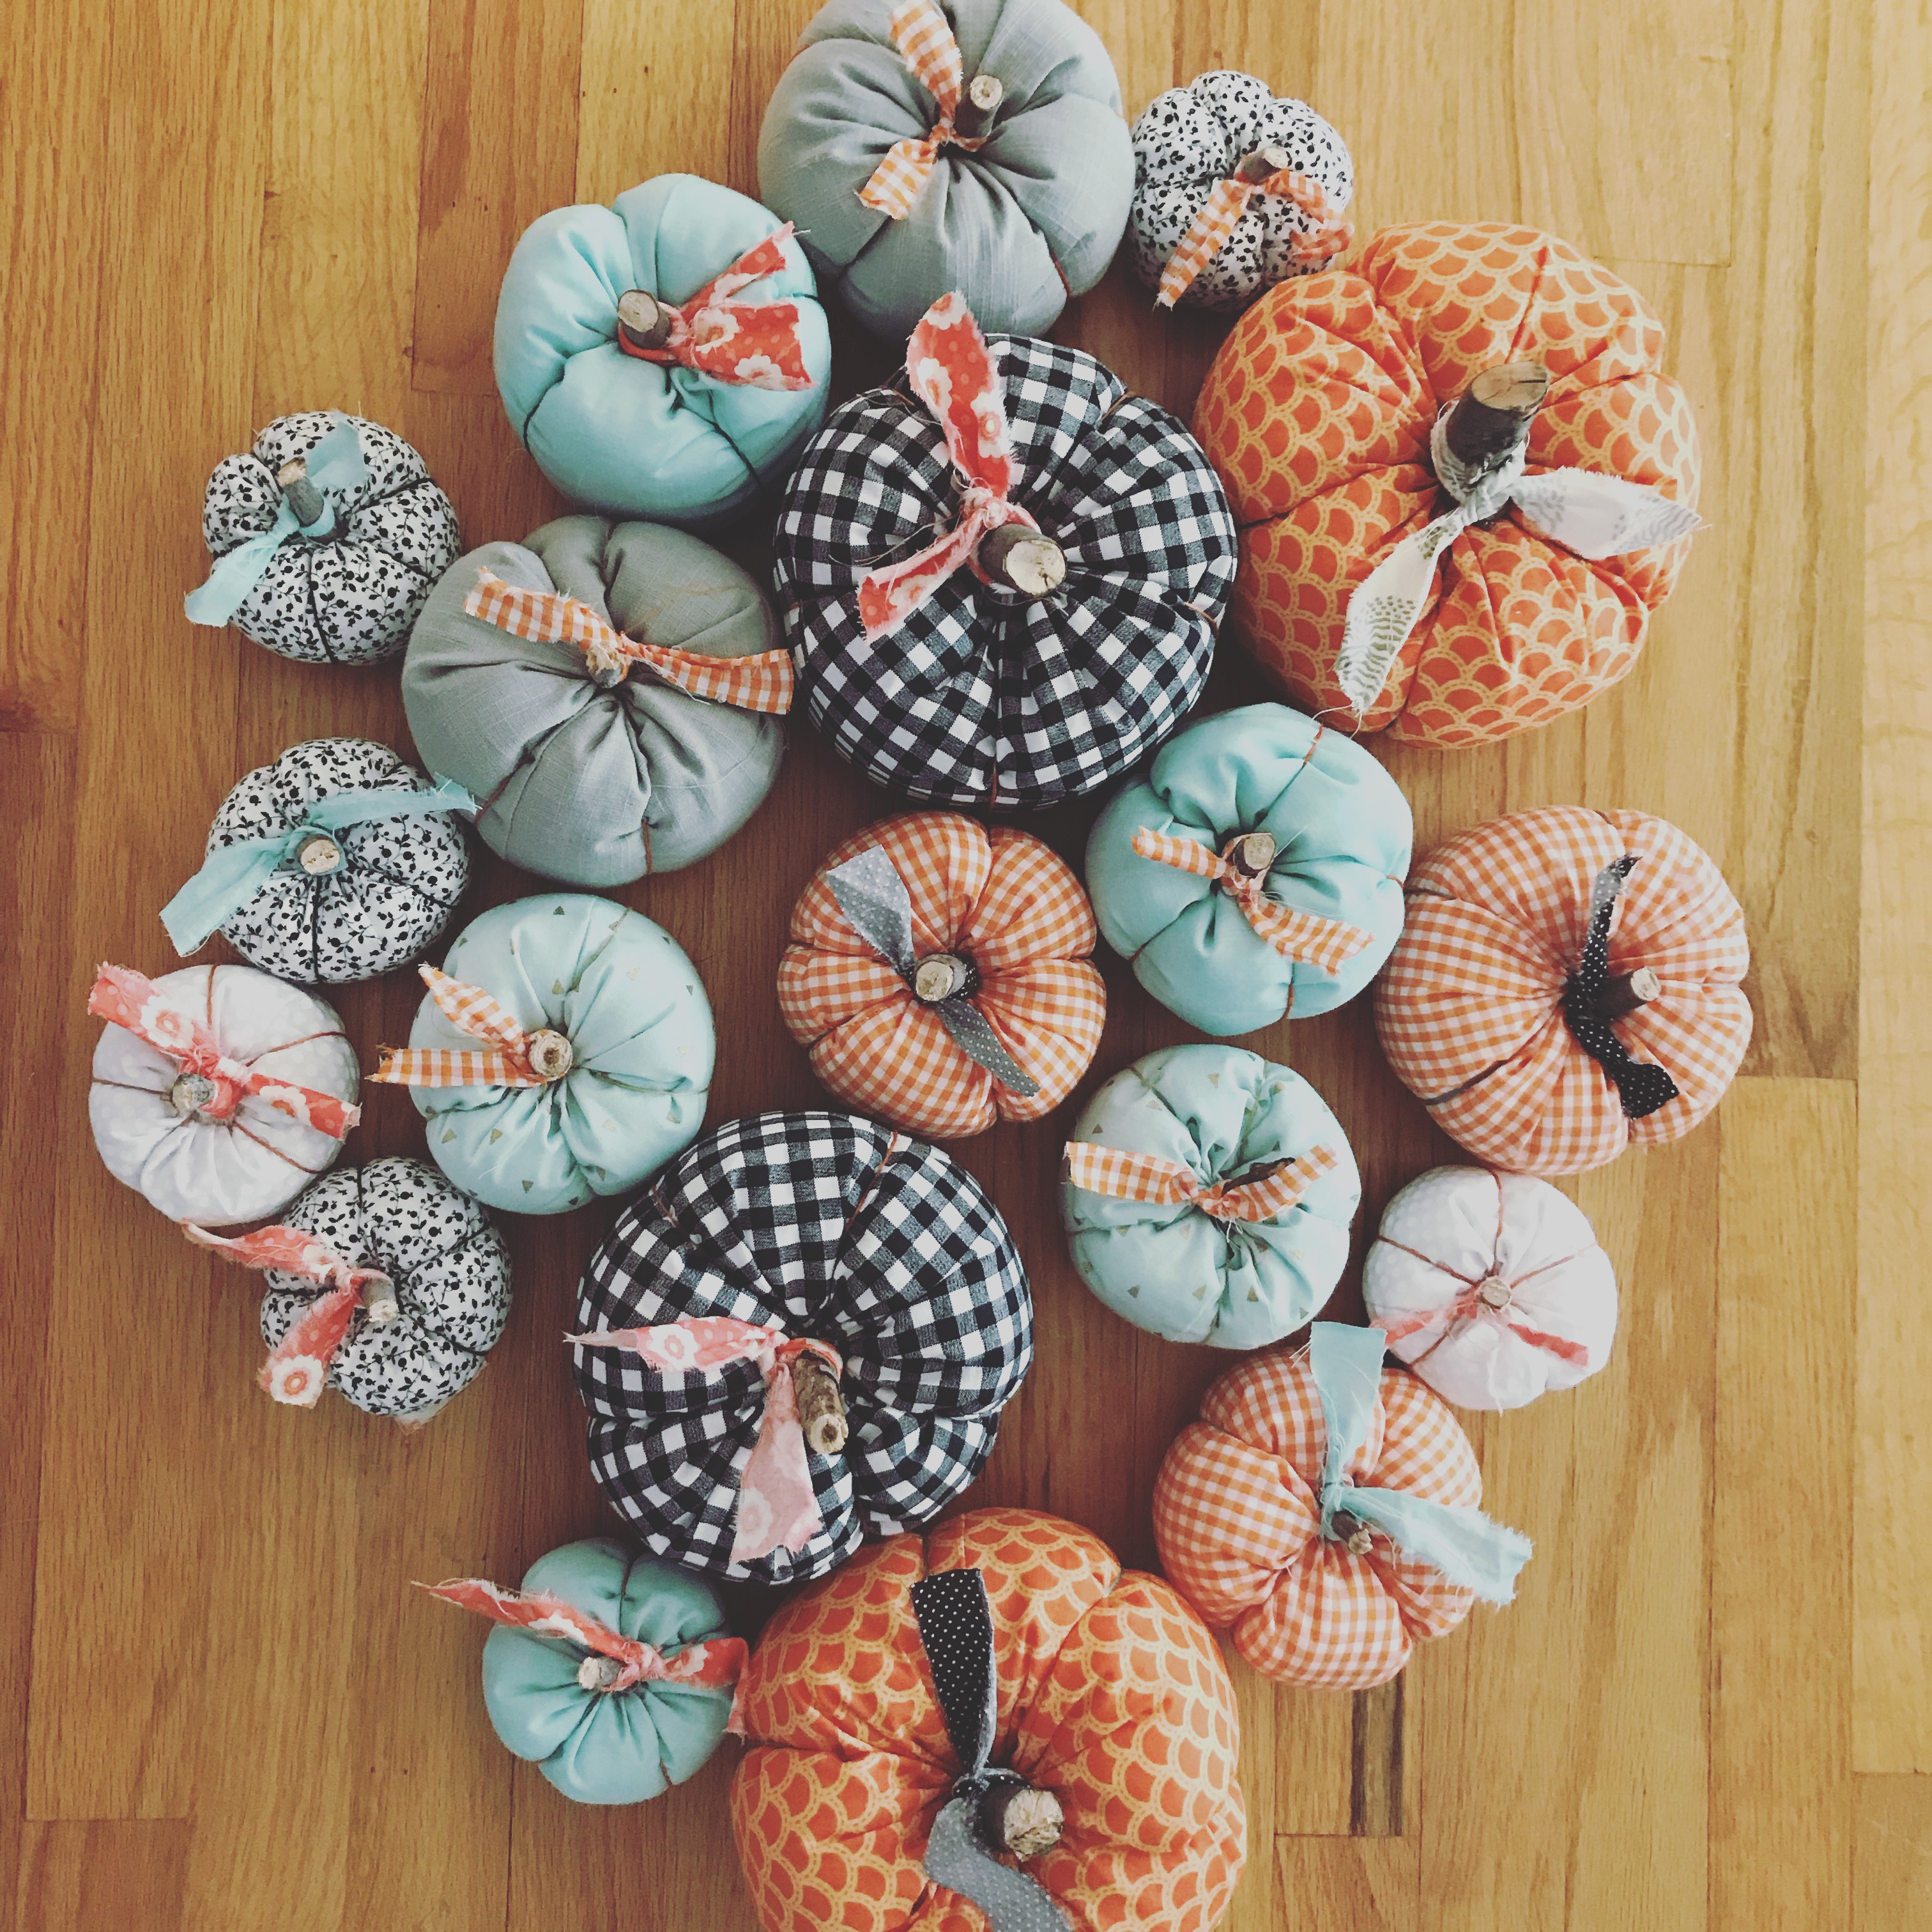
You can make a whole pumpkin patch worth of these cuties in an afternoon. Imagine your entire fireplace mantle or hearth covered in fabric pumpkins!

Pingback: 30+ Easy Halloween Sewing Projects | Coloured Buttons
Thanks for the mention!
Pingback: Easy Fabric Pumpkins {Tutorial} – A Medley of Life
Pingback: 30+ Easy Halloween Sewing Projects | Sew a Softie
Love these. Thanks for sharing.
Thanks for sharing! I started making mine and sewing the bottom not bunching and I knew there was a easier way. Makes it some much easier then folding the corners under on the bottom. 😆